This page is currently being prepared.
Unreal Engine Usage Guide
1) PSX Style Low Poly Character FBX Import Checklist
: Please check the following items when importing the provided character FBX into Unreal Engine.
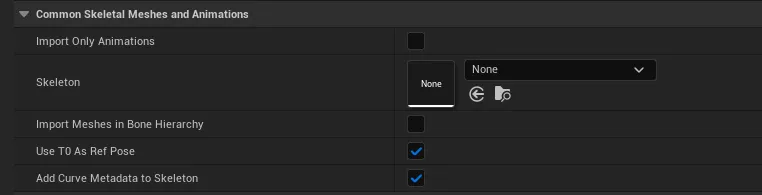
- Import Skeletal Meshes: Check
- Skeleton: Set to None
- Update Skeleton Reference Pose: Uncheck
- Use T0 As Ref Pose: Check
(Preserves the Mixamo-based T-Pose at frame 0) - Import Meshes in Bone Hierarchy: Uncheck
- Import Animations: Check if needed
*** Material Setting Tip***
For the authentic PSX aesthetic, we recommend setting Specular to 0 and Roughness to 1.
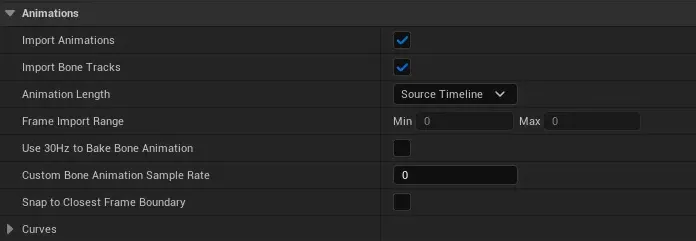
2) Animation Master Bone Character Import Checklist
- Use T0 As Ref Pose: Check
- Import Animations: Check
- Animation Length: Select Exported Time or Source Timeline
- Use Default Sample Rate: Uncheck
Foot Lock in Unreal
< Import Settings >
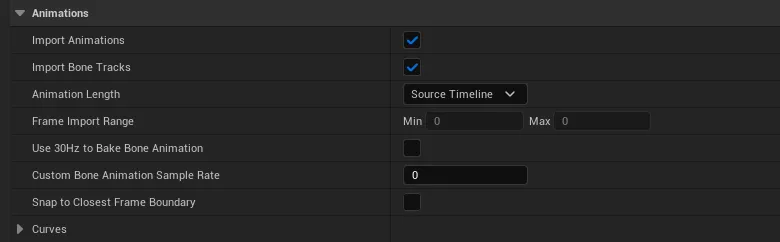
1. Import Master Bone & Animation
- Use T0 As Ref Pose: Check (Enable)
- Import Meshes in Bone Hierarchy: Uncheck (Disable)
- Import Animations Section
- Import Animations: Check (Enable)
- Animation Length: Change to Source Timeline
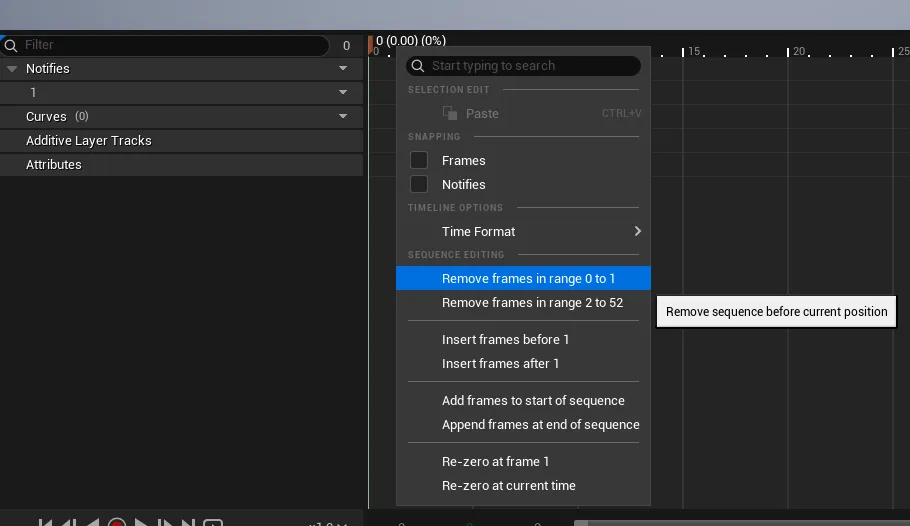
2. Delete T-Pose Frame in Animation Sequence
- Open the Animation Sequence to remove the T-Pose at frame 0.
- Right-click near frame 0 on the timeline → Select Remove frame in range 0 to 1 to delete the frame, then Save.
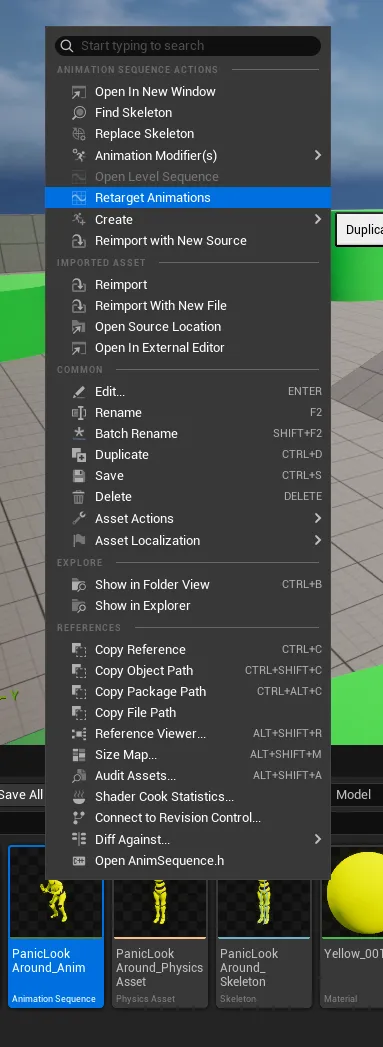
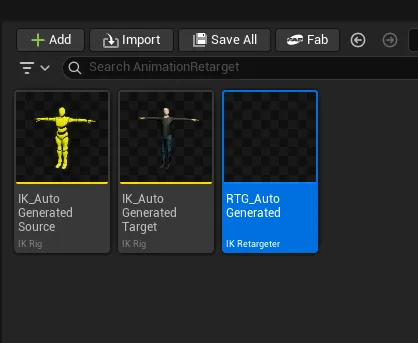
3. Retarget Animations
- Run Retarget Animation
- This refers to the action shown in the screenshot: Right-click → Retarget Animations
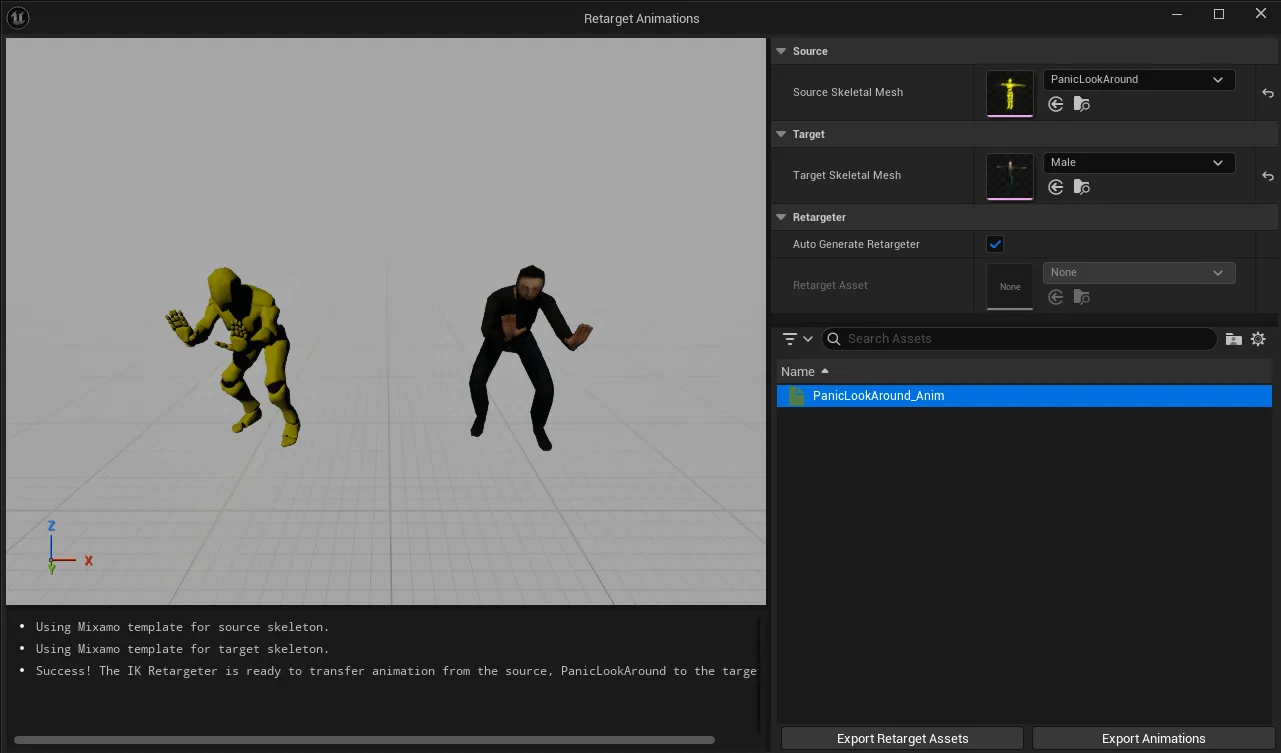
- Assign Target Animation
- Assign Target Skeletal Mesh.
- Select the animation to retarget, then click Export Retarget Assets and specify the save location.
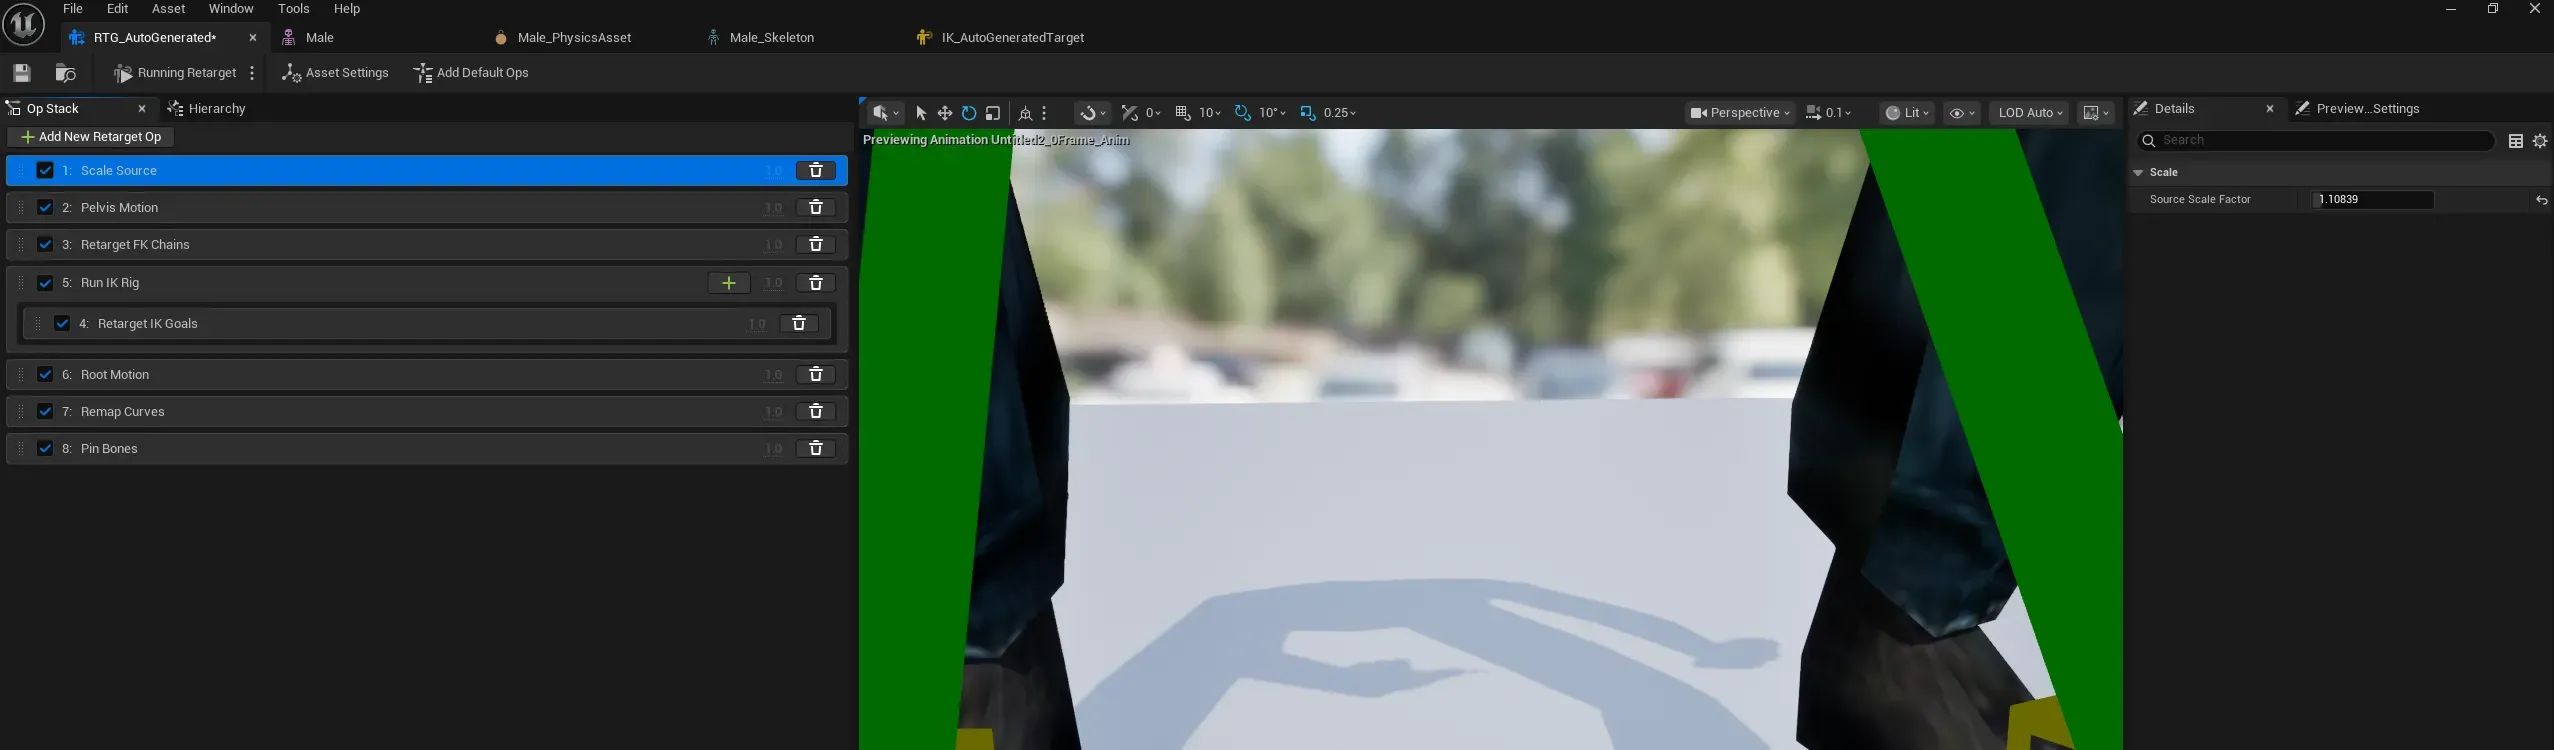
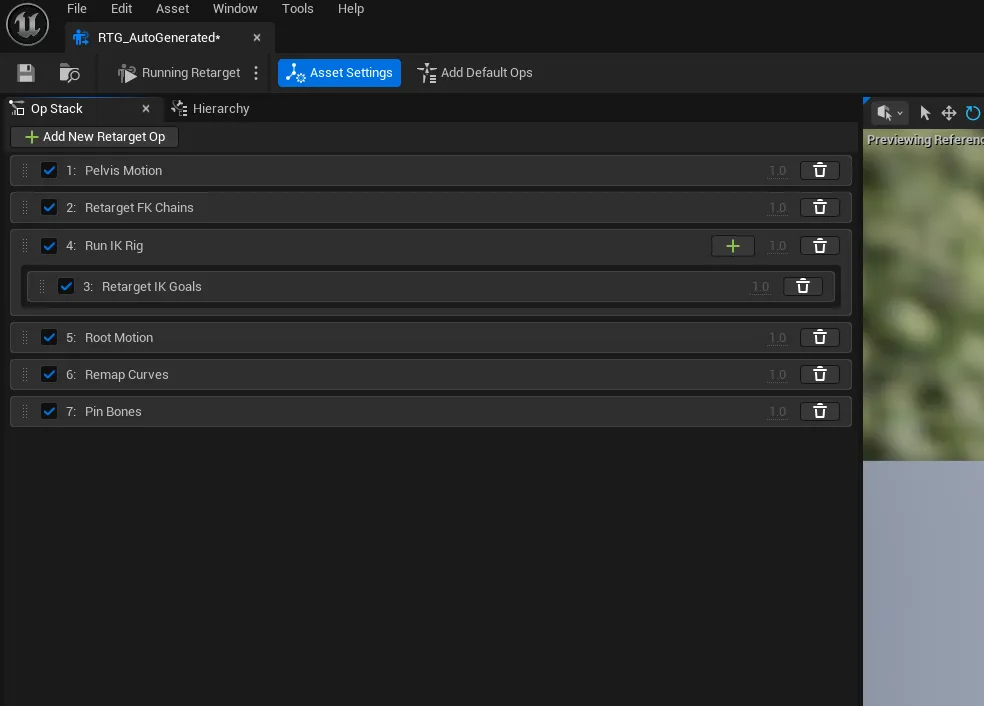
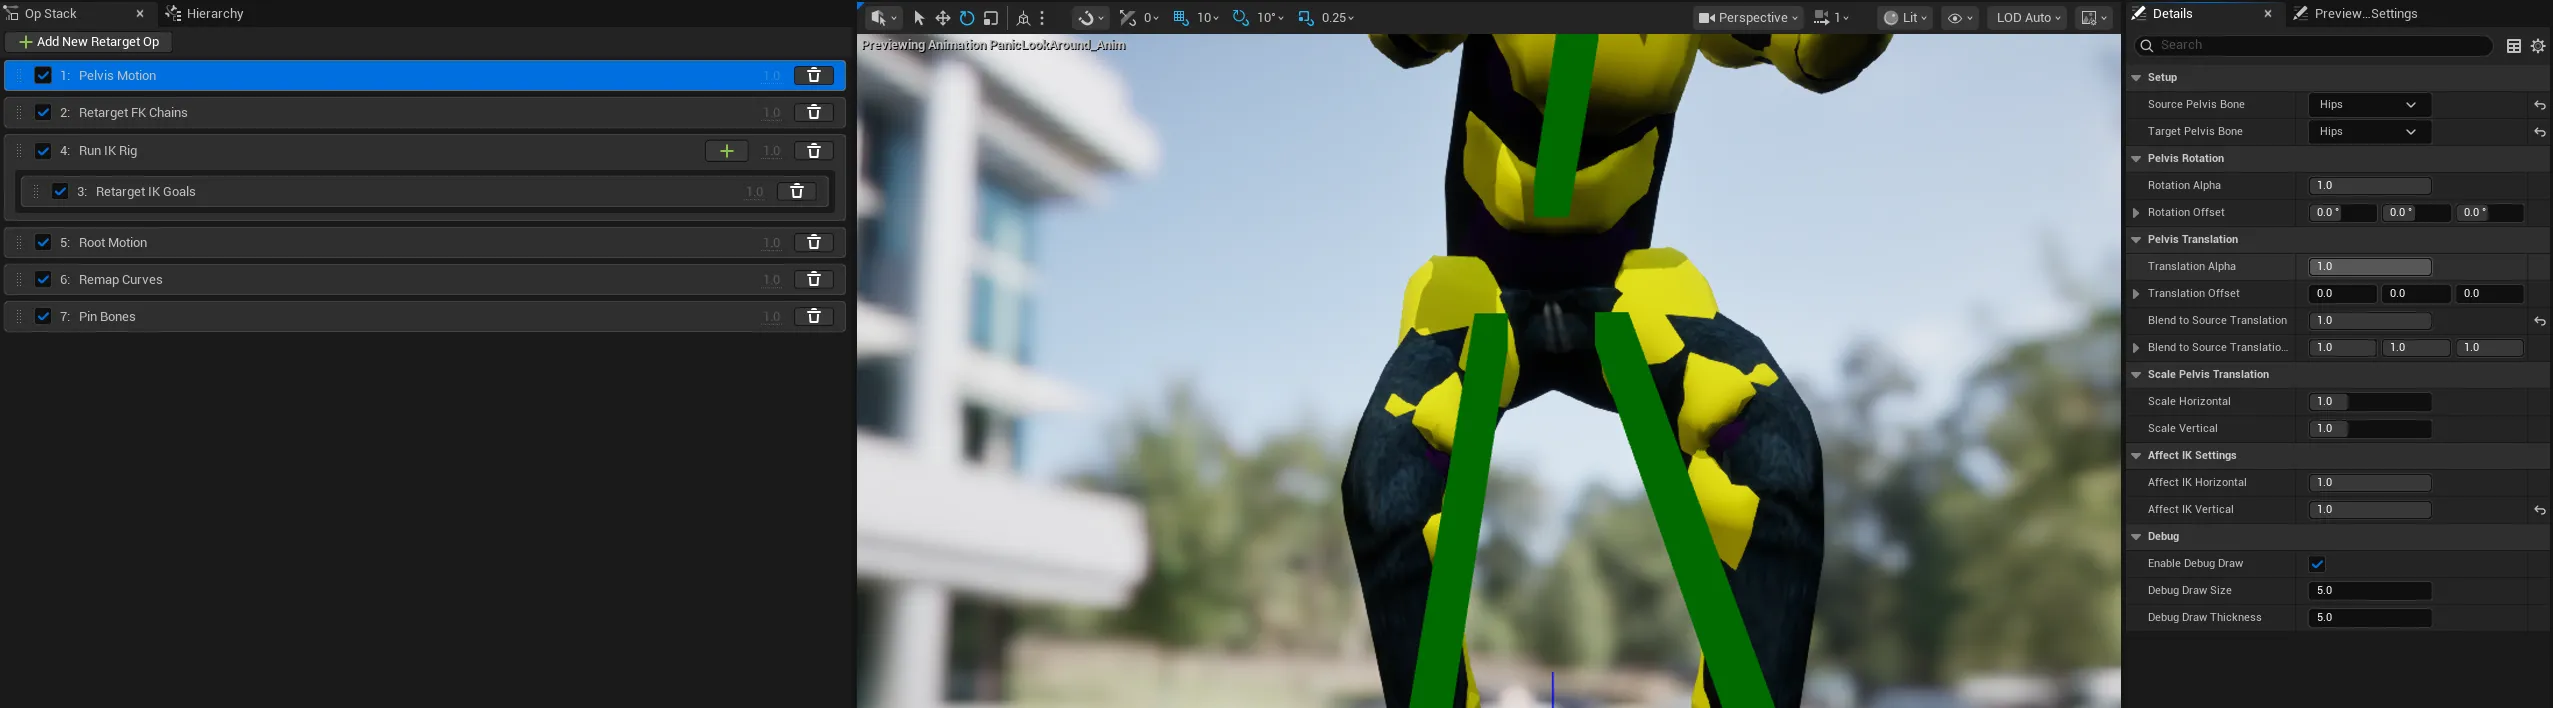
4. IK Retargeter Setup
- Open the IK Retargeter to configure settings.
- Ensure all items in the Op Stack are enabled.
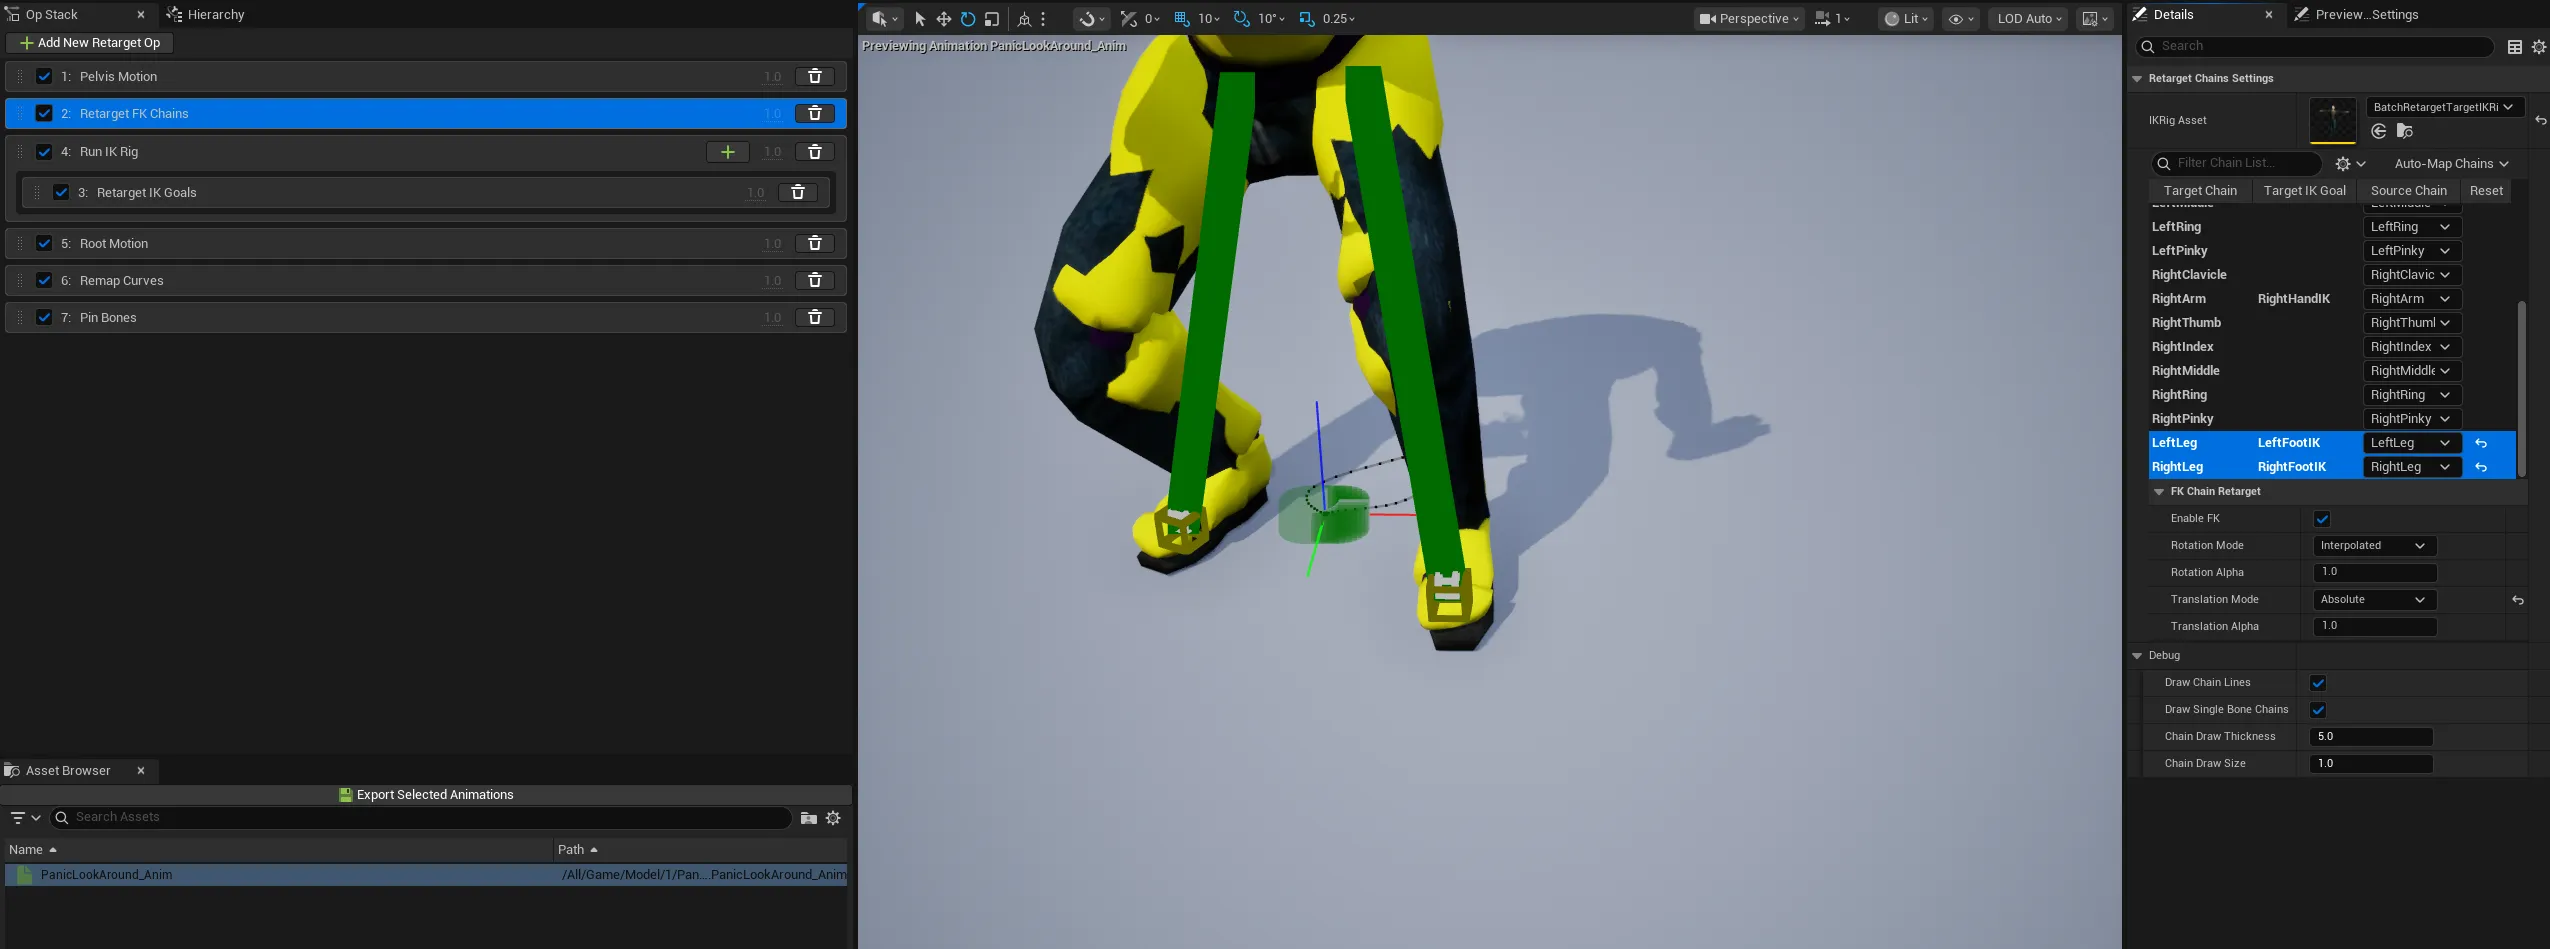
- Mitigate Foot Sliding
- Retarget FK Chains → Select
LeftLegandRightLeg, then change Translation Mode toAbsolute.
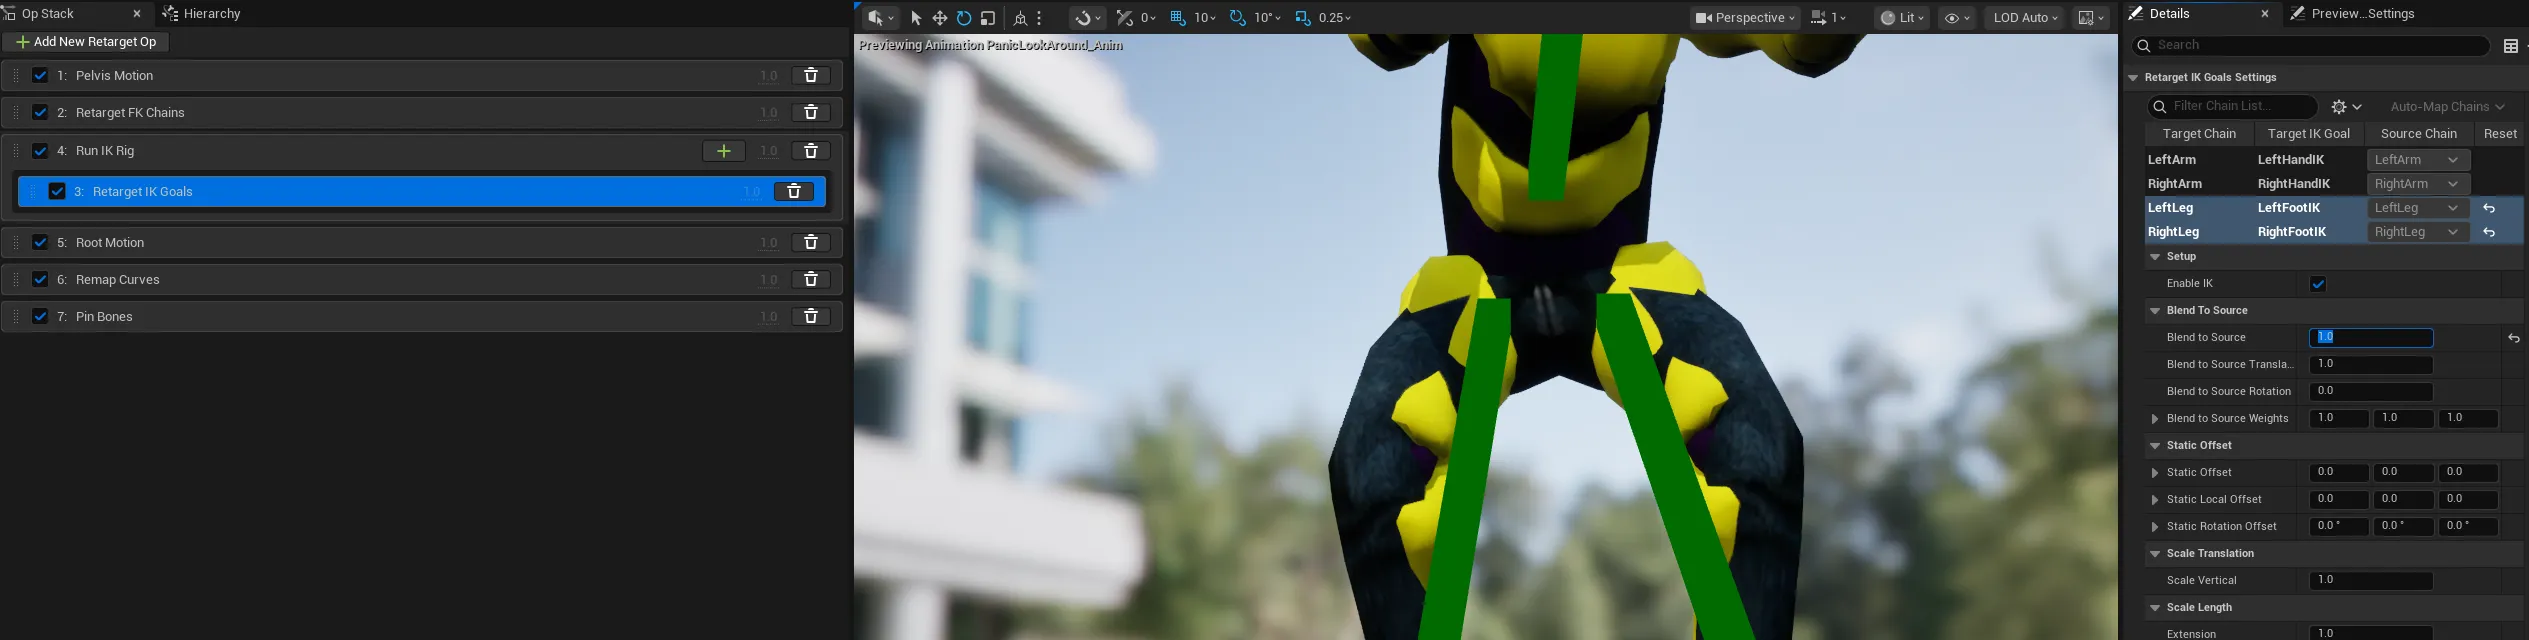
- Retarget IK Goals → Select
LeftLegandRightLeg, then change Blend to Source to1.0.
- Pelvis Motion → Change Blend to Source Translation to
1.0. - Affect IK Vertical → Change to
1.0.
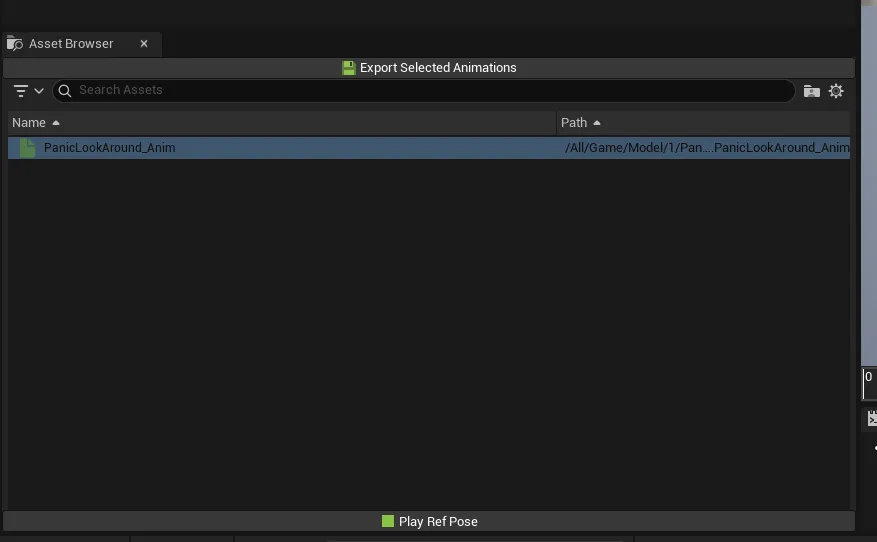
5. Export Animation
- Click the
Export Selected Animationsbutton to export the animation.
6. Place the Animation Sequence in the Scene

When Character Scales Differ
- Click the
+ Add New Retarget Opbutton at the top of the right Op Stack panel. - Add
Scale Source - Adjust the
Source Scale Factorin the Details panel to match the Master Bone.
- Adjust the value until the feet make proper contact with the ground.